It seems like I've been learning little things here and there, all over the place. I hope I will be able to remember it all when the time comes. I've learned how to read hydraulic schematics and what different components do in hydraulic systems. I understand what is going on with a orifice hydraulic system. You got high pressure on one side and after the oil goes through the orifice the pressure will drop. Orifices have a lot to do in hydraulic systems. I've got a better understanding the difference between cavitation and aeration. Cavitation happens when there is a rapid change in pressure in fluid. Small cavities are formed and immediately implode. The video of the blender was pretty cool to see. That's interesting to see that cavitation is what is braking the food down to smaller pieces not real the blade. Aeration on the other hand is when air is introduced in to the system.
At work, on the newer bus we got hydraulic powered cooling fan. The hydraulic for it is all electronically controlled. So the problem was that the fan was staying on all the time. I didn't get to mess with it much but it was cool to see you were able to hook up a computer to the computer that controlled the fan. We had Parker diagnostic program to check this out and mess with setting. It's not fixed yet because of poor connection the computer.
Week Hours (plus last weeks): 65
Hours To Date: 189
Sunday, May 12, 2013

Saturday, April 27, 2013
SPQ 13 Daniel
This
fitting ID is somewhat confusing. It would have been nice if there was one
system used when making fittings. So I can say I’m confident in how to measure
and look up a fitting. I would be able to just spout out what a fitting is just
by looking at it, but maybe someday.
Week Hours (plus last week's) : 71
Hours To Date : 124
Week Hours (plus last week's) : 71
Hours To Date : 124
Monday, April 15, 2013
SPQ 13 Daniel
This week and really the past few weeks, have been a review for me. Not saying that I'm not learning, I'm just finding those hard to find files deep back in my head. I learn the best with hand and repetition.
So things I'll learned, well, finding the short by using a light was one of them. I would say that it is similar to using them ohm meter but without the always changing number that shows up on the meter screen.
I've learned the three separate coils of wires in the stator produces a three phase voltage output. This lets more current flow though the diodes, thereby increasing the output of the alternator. The diodes help with turning the AC voltage to DC, by only letting the positive electrons pass though.
Any other thing that I've learned is that Specific Gravity (SG) is temperature sensitive. So when a battery is fully charged and at a temp of 80 F, the SG should be 1.265. For every 10 F above 80 F add 0.004 to your SG. Also for every 10 F below 80 F subtracted 0.004 for your SG.
Here are some pictures for work. So here are two pictures of the some u-joint on a driveline on a Thomas bus. On both sides the bearing caps are loose and they have been spinning around. Also one of the bearing hold downs is broken. Yeah, there was a little bit of play in this u-joint.


On the same bus, looking at the rear-right brake drum, I would say this drum is out of spec. The drum has been worn down making a ridge that is little over 1/8 of an inch on the outer edge. Also on the rest of the surface is a lot a deep gouges.

So things I'll learned, well, finding the short by using a light was one of them. I would say that it is similar to using them ohm meter but without the always changing number that shows up on the meter screen.
I've learned the three separate coils of wires in the stator produces a three phase voltage output. This lets more current flow though the diodes, thereby increasing the output of the alternator. The diodes help with turning the AC voltage to DC, by only letting the positive electrons pass though.
Any other thing that I've learned is that Specific Gravity (SG) is temperature sensitive. So when a battery is fully charged and at a temp of 80 F, the SG should be 1.265. For every 10 F above 80 F add 0.004 to your SG. Also for every 10 F below 80 F subtracted 0.004 for your SG.
Here are some pictures for work. So here are two pictures of the some u-joint on a driveline on a Thomas bus. On both sides the bearing caps are loose and they have been spinning around. Also one of the bearing hold downs is broken. Yeah, there was a little bit of play in this u-joint.
On the same bus, looking at the rear-right brake drum, I would say this drum is out of spec. The drum has been worn down making a ridge that is little over 1/8 of an inch on the outer edge. Also on the rest of the surface is a lot a deep gouges.
Week Hours: 33
Hours To Date: 53
Monday, April 8, 2013
SPQ 13 Daniel
I have been studying up on how alternators work. I understood what their purpose is and what their did, but I wasn't sure on how alternators work. So, by doing some research, I now know how alternators work. I don't know everything but more than before.
How alternators work in a nut shell:
The parts of an alternator are the rotor, stator, brushes, slip rings, volt regulator, and rectifier. Basically the rotor becomes a electromagnetic by voltage being applied through the brushes and slip rings to the windings of wire on the rotor. The interlacing fingers of the housing surrounding the windings, create north and south poles. The stator surrounds the rotor. The stator is made up of three separate wires, rapped around in small coils, in a full circle. As the rotor spines, inside the stator, the magnetic field moving past the wires (in the stator) will produce or induce current flow in the wires. Now this is creating AC but we need DC. Diodes in the rectifier help us with this problem. Diodes only let current flow in one direction.
Now I know there is more detail than this. There is more stuff about three-phase voltage, wye connection, delta connection, voltage regulator, and what not. Maybe I'll talk about it later.
 Hours this week: 20
Hours to date: 20
How alternators work in a nut shell:
The parts of an alternator are the rotor, stator, brushes, slip rings, volt regulator, and rectifier. Basically the rotor becomes a electromagnetic by voltage being applied through the brushes and slip rings to the windings of wire on the rotor. The interlacing fingers of the housing surrounding the windings, create north and south poles. The stator surrounds the rotor. The stator is made up of three separate wires, rapped around in small coils, in a full circle. As the rotor spines, inside the stator, the magnetic field moving past the wires (in the stator) will produce or induce current flow in the wires. Now this is creating AC but we need DC. Diodes in the rectifier help us with this problem. Diodes only let current flow in one direction.
Now I know there is more detail than this. There is more stuff about three-phase voltage, wye connection, delta connection, voltage regulator, and what not. Maybe I'll talk about it later.
Hours to date: 20
Monday, March 25, 2013
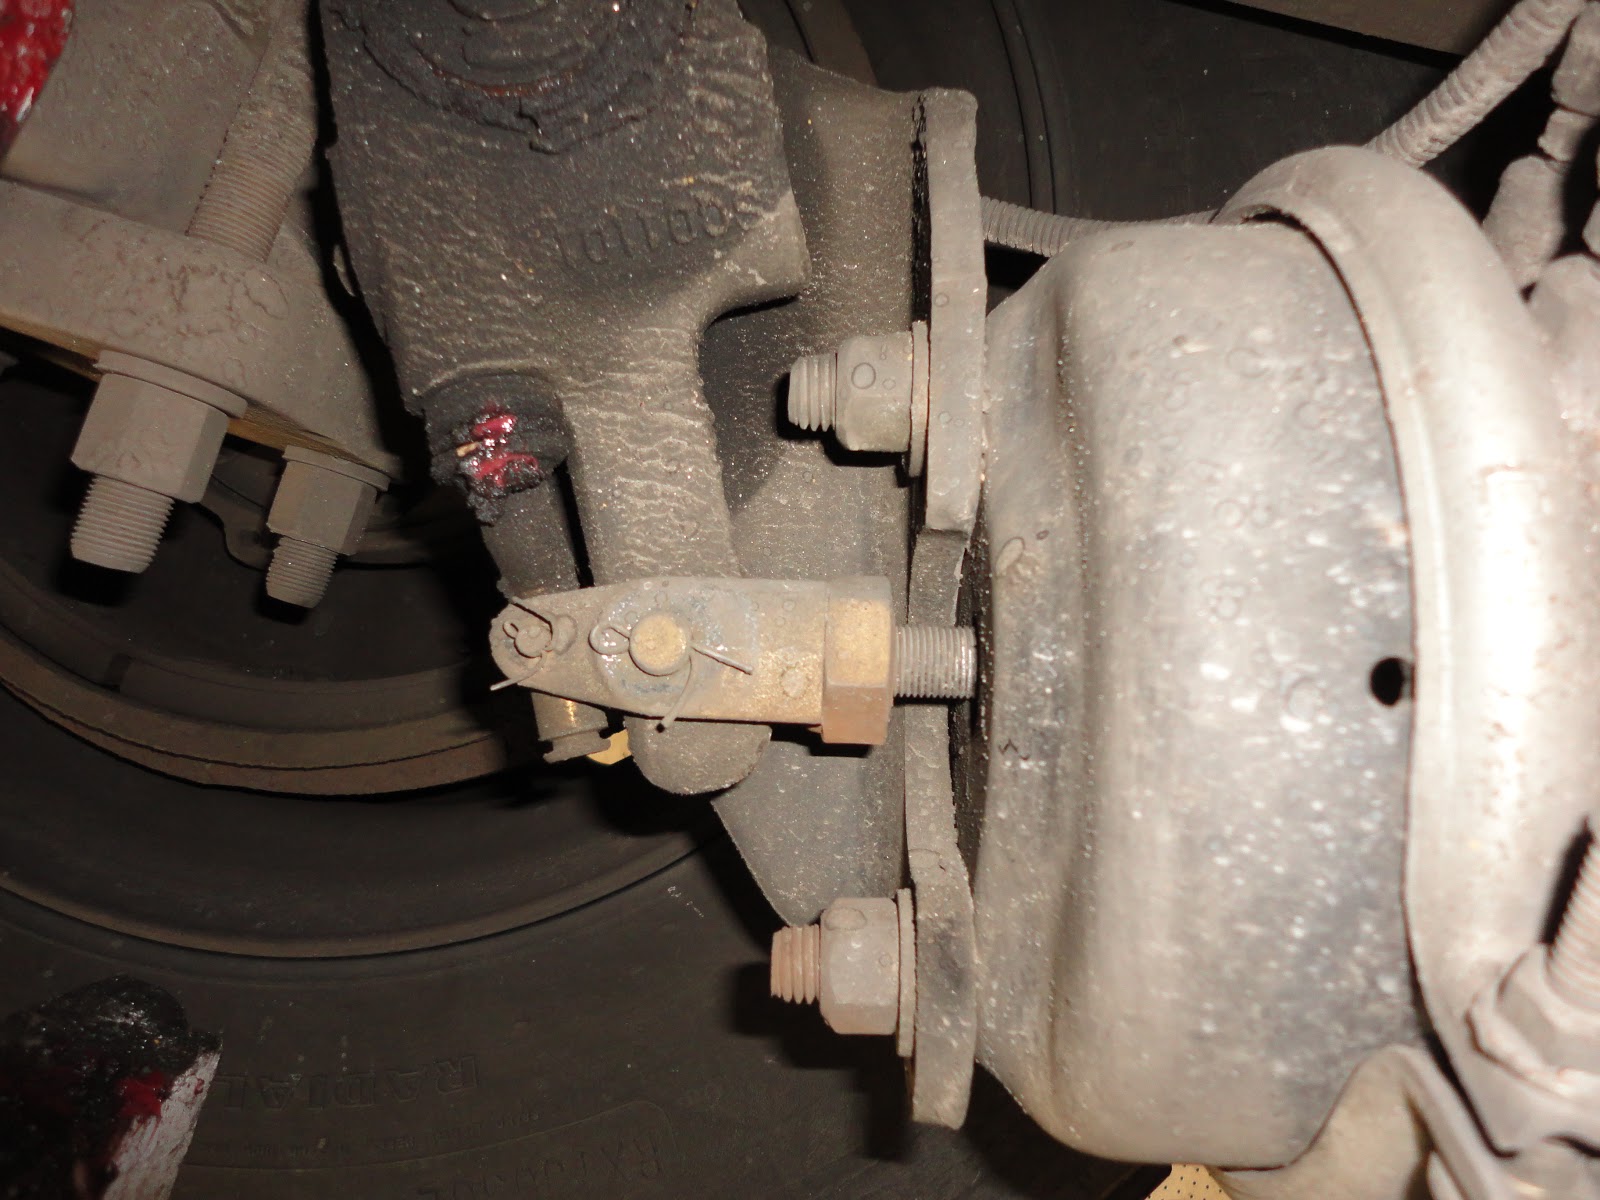
I was inspecting a 3030 MGM brake chamber on a bus and found
something that didn't look right. With no brakes applied, the push rod was
sticking up farther than it should. Then I pulled the dust cap off the top of
the brake chamber. Come to find that it didn't look right. So we changed out
the piggyback. To do so you first apply the service brakes. Then take a vis-grip
plier and clamp it on the push rod, close to the face of the brake chamber. You
can leave the service brake part of the chamber and the slack adjuster in
place. There is a clamp that holds the two halves of the brake chamber
together. Taking off the camp, witch allows you to take the piggyback (maxi
brake part) off. Them you should bleed out the air in the lines, by applying
the maxi brake. Now you can take off the two air lines and now the piggyback is
totally free. To install the new piggyback just revers the process.
rear right side rear left side
(broken brake chamber) (still good)


Monday, March 18, 2013
I brought in a bus for it's 2,000 mile check up. I was at the point were I was checking out the wheels. Looking for any damage, tire pressure, uneven tread wear, and make all lug nuts are tight. Come to find out that there were two nuts missing and the rest were all loose. It wouldn't have been to long until that wheel would have come flying off, going down the road. So I got two new nuts and asked what the torque specs were. I was told just to take the one inch impact wrench and hammer down on the lug nuts. Well now I can see where is one possibility why the lug nuts where coming loose.
So pretty much all the buses have this type of mount for the wheels to the hub. They call it a ball mount. The brake drum fits pretty snug to the studs and the hub. The inside wheel is held on by inner nut and the outside wheel is held outer nut. Both nuts center the wheels on the hub.

Hours for the week and last week: 41 Total hours: 255
So pretty much all the buses have this type of mount for the wheels to the hub. They call it a ball mount. The brake drum fits pretty snug to the studs and the hub. The inside wheel is held on by inner nut and the outside wheel is held outer nut. Both nuts center the wheels on the hub.
Hours for the week and last week: 41 Total hours: 255
Sunday, March 3, 2013
I have spent more time at the DMV than I would like to, but now I have my class B CDL. My trainer had me practice driving and doing the pre-trip check a lot, so when it came to the real test it was no problem. I didn't get 100% on my drive or pre-trip test, but the things I got marked down for were little small nit picky things. I feel like the testers are not going to give anyone 100%.
Hours for the week: 23 Total hours: 214
Hours for the week: 23 Total hours: 214
Subscribe to:
Posts (Atom)